How to Turn Your Photos Into a Comic Book (Without Drawing Anything)
There are several honest ways to turn a folder of phone photos into a comic, from a simple filter to a human illustrator to an AI tool. Here is how they differ, which photos work, and where people usually get stuck.
Last reviewed . Written by our editorial team from our own product knowledge and general, publicly available information about the other routes (filters, illustrators, photo books). The opinions are ours. We make myComics, one of the tools discussed here, so weigh our view of it accordingly.
By the myComics.ai Editorial Team9 min read
How to guide · Editorial disclosure
Quick answer
- Decide first whether you want one comic style picture (a filter does that) or a whole story with the same people on every page (that needs a character built from several photos).
- For a story, 3 to 8 clear, well lit photos per person is the practical range. Variety of angle matters more than quantity.
- Pick the visual style before you shape the story, because style changes which stories land well.
- A commissioned illustrator is still the better choice for a milestone gift where authorship and a distinct artistic voice matter more than speed.
Almost everyone who asks us how to turn photos into a comic has the same folder open on their phone: a few hundred pictures from a trip, a birthday, a wedding, and a vague sense that there is a better story in there than a slideshow. The comic in their head is usually clear. What is unclear is whether getting there needs an illustrator, a weekend of drawing, or just the right app.
The honest answer is that it depends on what you mean by “a comic”, and there are at least four reasonable routes. We make myComics.ai, which is one of them, so we have an obvious interest here. We will still try to be straight about when one of the other routes is the better fit, because for a good share of people it is.
What does “turning a photo into a comic” actually mean?
Two very different things hide under that phrase, and picking the wrong one is the most common source of disappointment we see in questions about this.
The first is a filter. You feed in one photo and get the same photo back with flattened colors, inked edges and some halftone dots. It takes seconds and it is fun. Many photo editing apps offer something like it. But it is still one image. You cannot put it on page four of a story, because there is no page four.
The second is a character. Instead of transforming one picture, the tool looks at several photos of a person and builds a reusable comic version of them, one that can be redrawn from a new angle, in a new pose, with a new expression, panel after panel, and still read as the same person. That is what makes a book possible rather than a single picture.
If all you want is a fun profile picture or one striking image for a card, a filter is the better choice. It is faster, simpler and usually cheaper. Everything below about photo selection and story setup matters mainly for the second kind.
What are the main ways to do it?
Here is how we would lay out the options. None of them is the right answer for everyone.
| Route | Good for | Trade off |
|---|---|---|
| Photo filter app | One striking image, a profile picture, a card | One picture only; no story, no new poses |
| Drawing or tracing it yourself | People who enjoy the process and have time | Slow, and the result depends on your hand |
| Commissioning an illustrator | A milestone gift with real authorship | Budget and waiting time; worth it for the right occasion |
| AI character tool | A full story with consistent faces, made in an evening | Stylized likeness, not a portrait; quality depends on your photos |
| Photo book | Keeping the real photos exactly as they are | Not a comic, but sometimes that is the point |
Drawing it yourself deserves more credit than it usually gets. Tracing over your own photos on a tablet or with a lightbox is how a lot of people start making comics, and a hand drawn four panel strip about your friends has a charm no tool reproduces. If you have a few free evenings and like the idea, try that first.
A commissioned illustrator gives you something no tool does: a specific artistic voice and a person who can take your idea and make it better than you described it. For a wedding, a big anniversary or a retirement, that is often worth the budget and the wait. Plan ahead, because good illustrators are booked.
The AI route makes the most sense when you want a story with several pages, when the people need to look consistent across them, and when you would rather try an idea tonight than brief someone and wait.
Which photos work best?
If you go the character route, this is the step that decides most of the final quality, and it takes a few minutes.
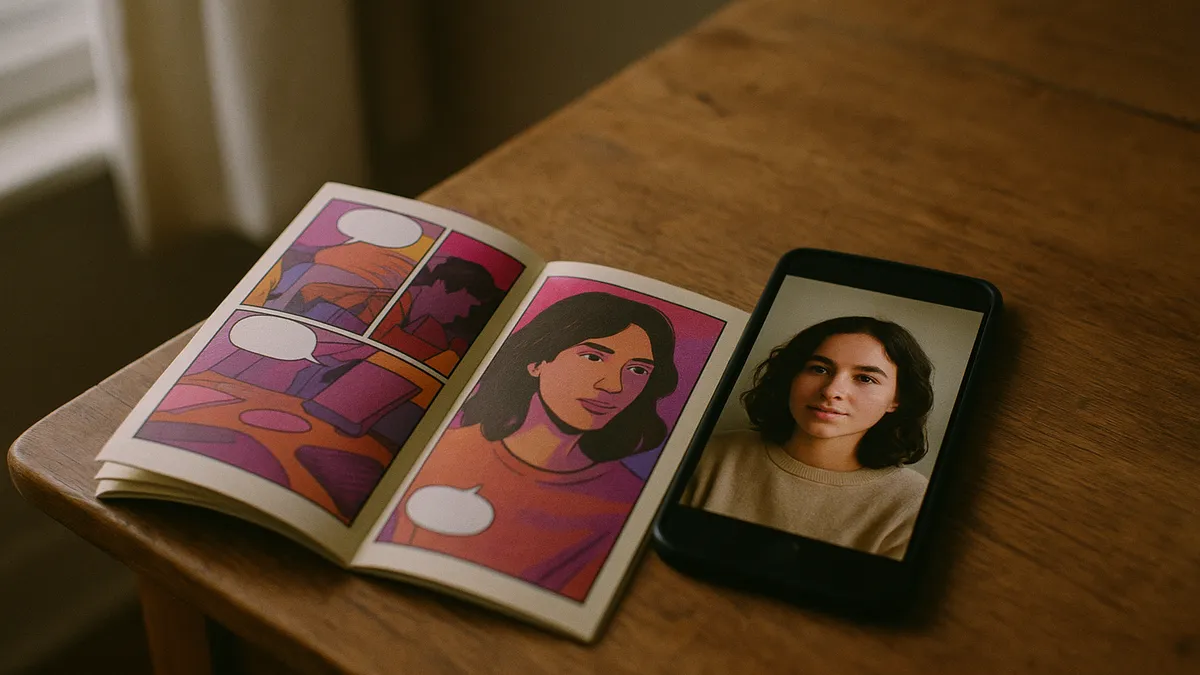
Aim for three to eight photos per person. Below three, the character has too little to work from and tends to drift, so the face on page two slowly stops matching the face on page seven. Above eight, you are mostly adding repetition.
What to look for:
- The whole face, unobstructed. No sunglasses, no hand across the chin, nobody cropped at the eyebrows.
- Even, natural light. Daylight near a window beats a dim restaurant. Harsh shadows across half a face are the most common problem.
- A couple of different angles. Two or three straight on shots plus one slight three quarter turn work better than five nearly identical selfies.
- Reasonable resolution. A normal phone photo is plenty. A screenshot of a screenshot is not.
What to avoid: heavy beauty filters (they have already changed the face you are trying to capture), group photos where your subject is a tiny face in the back row, and motion blur.
For a comic about more than one person, repeat this for each of them. Each becomes their own character, and they can then share panels. Much of this advice also applies if you are briefing an illustrator: clear, well lit reference photos make their job easier too.
Why choose a style before writing the story?
It is tempting to treat visual style as a finishing touch. It changes what kind of story lands well, so we would decide it early.
- Superhero is bold and high contrast. It suits triumphs: a graduation, a promotion, a marathon.
- Manga is expressive, with a lot of range between comedy and sincerity. It suits friendship and coming of age stories.
- Noir is moody and dramatic. Very good for mysteries and deadpan jokes, much harder to make warm.
- Cartoon is light, rounded and friendly. The safe choice for kids, pets and anything playful.
A small test we like: say the story’s premise in one sentence, then ask which of those four you would expect to see it drawn in. That instinct is usually right, whether you are using a tool or describing the job to an artist.
What does the process look like, step by step?
In myComics, and in character based tools generally, the flow looks roughly like this:
- Upload your photos for each person who will appear.
- Check the character. You see the comic version of each person before any pages exist. If the likeness is off, swap in better source photos now, not after twenty pages.
- Pick a style. See above.
- Set up the story. Give it a premise: the occasion, the tone, roughly what happens. You do not need to write dialogue or plan panels.
- Make choices as it goes. The story branches, and you decide what happens at those points. This is what keeps it feeling like your comic rather than a template with a face pasted in.
- Read, export or print. Read it in the browser, download a PDF, or order a printed copy.
Where do people usually get stuck?
They upload one photo and expect a book. One photo gives one picture. To draw someone from a new angle on page nine, a tool needs more than a single frontal shot.
They skip the character check. That step exists so you can catch a likeness problem in a minute instead of after the whole book is made. Look at it properly.
They over specify the story. A premise plus a tone tends to work better than a rigid panel by panel script. Say what the story is about and leave the pacing alone.
They pick the style last. By then the story has been shaped by whatever style was used, and switching feels like fighting the material.
They use a group photo as a source. A wedding shot where your subject is one face among eleven does not give much to work with. Crop first, or pick a photo where that person is the subject.
What do you actually end up with?
Three possible outputs, and it helps to know which one you want, because it changes how much care the earlier steps deserve.
Something to read on a screen. The low stakes version. You make it, read it, send the link to the person it is about. A slightly off likeness is forgivable here.
A PDF. Useful when you want to keep it, print a couple of pages at home, or attach it to a message. People tend to reread PDFs, so small inconsistencies start to bother them more.
A printed book. The version people give as gifts, and the one that deserves the extra minutes on photo choice, because print holds still in good light in someone’s hands. If a personalized comic book is the real goal, treat the character step as the important one.
It is worth comparing this honestly with a photo book. A printed photo book keeps the real moments exactly as they happened, and for some occasions (a baby’s first year, a grandparent’s life) that is more moving than any drawing. A comic wins when you want a story around the people, including things that never happened.
How long does it take, and what does it cost?
With an AI tool, a first comic is an evening activity rather than a weekend project. The character step takes minutes and the story moves as fast as you make choices. In our case there is a free tier with credits so you can build a character and see real pages before paying for anything, with paid plans and credit packs for heavier use and printing ordered separately.
A filter app is usually quicker and cheaper still, and an illustrator takes longer and costs more, which is fair for work made by a person. Drawing it yourself costs time more than money.
For a gift, the practical limit is usually not making the comic but shipping a printed copy. If it needs to exist physically by a certain date, work backwards and leave a comfortable margin.
Is it worth it compared to commissioning an artist?
They do different jobs. An illustrator gives you authorship, a distinct voice and something one of a kind, at a price and timeline that suit a milestone. If you can afford it and the occasion matters, we think that is often the better gift, and buying directly from artists keeps a lot of good work going.
An AI comic tool gives you the ability to try an idea, see it, change your mind and try again the same evening. If you have never made a comic before, being able to get it wrong a few times cheaply is useful in its own right.
If you want to compare the tools before choosing, we keep a breakdown of the best AI comic generators, with a longer ranking in our comparison of AI comic generators, and a look at what the free options can and cannot do. We make one of the tools in those lists, so read them with that in mind.